Monday, 17 November 2014

Claymation

Our claymation consists of several characters racing to the end
To make a claymation first we had to create a few of our own characters made out of clay. Ours included a person, snail, dog, a pea and a Komodo dragon.
We then had to choose a location where the lighting stays the same, and there isn't much / no movement involved around. The reason why the location has to remain the same is because when the pictures are being taken, it will run more smoothly when it is being played on after effects, and there wont be any sudden changes. We made sure the lighting remains the same as well, as well as the positioning of the camera. We had to make sure the camera remained steady at all times, so we places clay under the phone so it wouldn't drop or move. 
The frame size was 1980x1080 which is an enlarged version of the original photo taken on the picture. Therefore it slightly larger when it's on After Effects, we then scale it so it's more smaller so that it fits to the frame. Our animation in total is going to be 5 seconds and we're going to have 10fps (frames per second), altogether it'll be 50 frames in total for the whole animation (10fpsx5seconds).
Other than having an extremely high quality camera, the quality could be improved by adding more frames per second, this would make it move near enough as if it were an animated movie.

Monday, 10 November 2014

Frame Animation


Firstly, you have to create a new file and change the width to 1920 pixels and the Height to 1080 pixels.


Change the setting from essentials to 'Motion', then a time frame would appear on the bottom of the screen.
 Make sure you switch from 'Create Video Timeline' to 'Create Frame Animation'.


Add a key frame to the timeline.

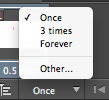
Once that is done, change the replay settings to 'Forever' then it will become a moving GIF. And then change the frames per second to 0.5 sec.


For each frame, there should be a new layer.

Add a piece of art to the first frame, and make sure that layer is showing.

Then after adding the second layer, the second layer must not be on show on the first layer, therefore it wouldn't appear with the second layer as soon as the first piece of art comes up.
When you add the second frame, put both of the layers on show, then create the piece of art.

Both of them should then show one after the other, and because it is a repetitive pattern, it will play continuously.


Monday, 3 November 2014

Edge Animate

Creating Code on Actions


 In order to make another shape disappear on the click of another shape you have to generate codes.
 You first have to have the second shape (Rounded Rectangle) to 'Hide' on 'stage'. Therefore it wont appear when you first view the website.
Then, on 'click' you have to 'Hide an Element' and 'Show an Element'. The purple 'Ellipse' will 'hide' and then the 'Rounded Rectangle' will 'show'.


In order to reverse this effect so that when you click on the 'Rounded Rectangle' it'll hide and the 'Ellipse will show, you have to do the opposite. So on click You have to 'Hide an element' which would be the 'Rounded Rectangle', and then the 'Ellipse' will 'Show'. Then it becomes a repetitive pattern.

Introduction to Web

The three languages that are used for the web are :
HTML, CSS and Java Script.
HTML is for - This coding is written in english, and it is for the basics of creating a website, for example, if you want the font to be bold and in Italics. HTML alters the font, colour, size etc. of text.


CSS is what the body of the web page would look like. Therefore CSS alters the style of the 

Java Script is for animation and interactive pieces on a website. This is usually generated in codes using more numerical figures rather than english.